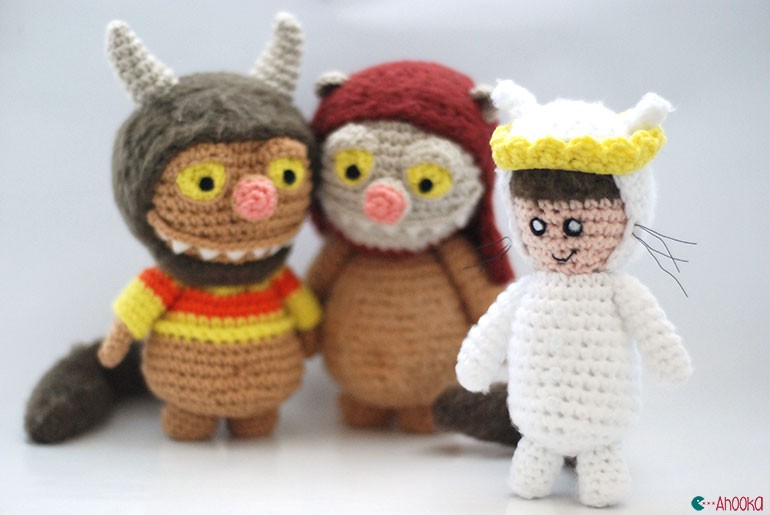
Last week I showed you my take on the Unnamed monster pattern from Sharon Ojala. I loved it so much that not only have I made Carol with it, but I also adapted it to KW (instructions here). But once I had made those 2 maximonsters, something was missing ! I wanted a Max that would match the aesthetic of the 2 monsters : not too realistic and a bit naive.
Making a pattern that would match someone else’s has been an exciting challenge for me, and the end result is quite different from the other patterns I made so far. I hope you’ll enjoy it!
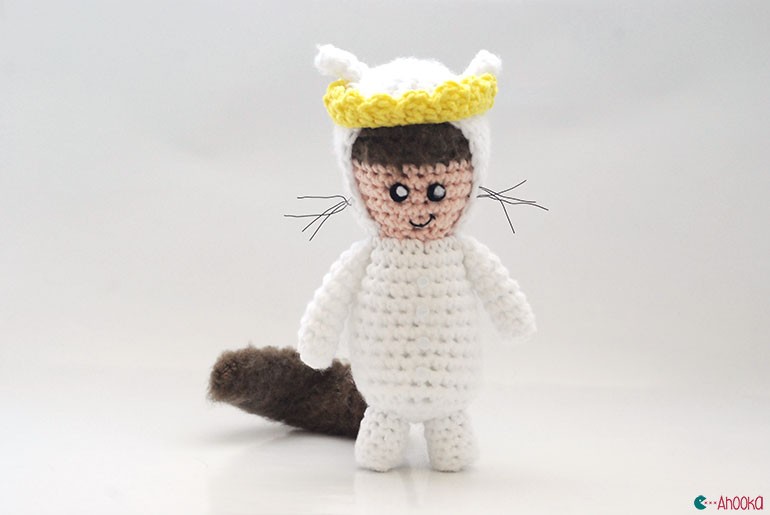
Material
– Use the same yarn as for the maximonsters. It should be acrylic yarn to be able to brush it and make the fuzzy aspect. I actually used Phildar’s cabotine which is a coton and acrylic mix as I didn’t have any 100% acrylic yarn but Red Heart Comfort worsted weight acrylic yarn used by Sharon in the unnamed monster pattern would be more appropriate !
Colors : brown, white, peach and yellow.
– a crochet hook that match your yarn (4mm with the Red Heart Comfort and 3mm with Phildar Cabotine)
– A bit of white and black felt
– Fabric glue (or wood glue) to glue on the felt details.
– A tapestry (or wool) needle to assemble the pieces
– Needle and embroidery floss for the mouth
– A pet brush to brush the acrylic yarn.
– Scissors
– A stitch marker (I use a paper clip)
– Stuffing
– (optional) 4 pipe cleaners for the tail
– (optional) A bit of black jewelry wire and cutting pliers
Size
Approximately 17 cm (6.7 inches) with Phildar Cabotine, but bigger with the Red Heart Comfort (I can’t tell exactly as this yarn is not available here)
Difficulty
Easy – Beginners friendly as long as you know how to assemble small pieces.
Abbreviations and stitches used.
MR: magic ring
st: stitch
sc: single crochet
sl st: slip stitch
ch: chain
dc: double crochet
dec: decrease (crochet 2 single crochet together – I use the invisible decrease technique but sc2tog will do just fine)
inc : increase (2 single crochet in 1 st)
BLO: back loop only
FO: Fasten of
(…,…)*x : repeat x number of times the instructions between brackets
Notes :
– This pattern is worked in continuous round : do not join or turn unless stated otherwise.
– Mark the last stitch of the round with your stitch marker in order to check that you’ve made the right amount of stitches in the round.
– This pattern already includes the increases and decreases shifts to make a perfect circle (check the tutorial to make a perfect crochet circle here)
– Your photos are welcome at facebook.com/ahookamigurumi ! I would be glad to see your work and add them to the “made by you” album.
Copyright
This free pattern (or parts of it) may not be reproduced, distributed, sold, translated, published, altered or posted (for sell or for free) over the internet or offline.
Head and body
Top to bottom.
With brown yarn
R1: sc6 in a MR (6)
R2: inc*6 (12)
R3: (sc1, inc)*6 (18)
R4: sc1, inc, (sc2, inc)*5, sc1(24)
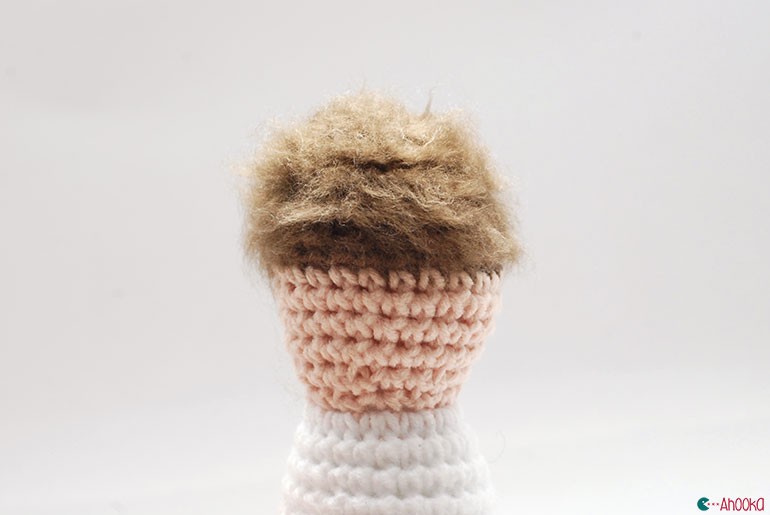
R5 à 7: sc1 in each st (24) – switch to pink yarn on last stitch of the last row
Before going on, brush with the pet brush to make the hair fuzzy.
With pink yarn
R8: in BLO – sc1 in each st (24)
R9 à 11: sc1 in each st (24)
R12: sc1, dec, (sc2, dec)*5, sc1(18)
R13: (sc1, dec)*6 (12) – switch to white yarn on last decrease.
Stuff the head
With white yarn
R14: inc*12 (24)
R15 à 24: sc1 in each st (24)
R25: sc1, dec, (sc2, dec)*5, sc1(18)
R26: (sc1, dec)*6 (12)
Stuff the body
R27: (sc, dec)*4 (8)
R28: dec*2 (6)
FO, weave the yarn tail through the front loop of each remaining stitches and pull it tight in order to close off the body. Then, weave in the end.
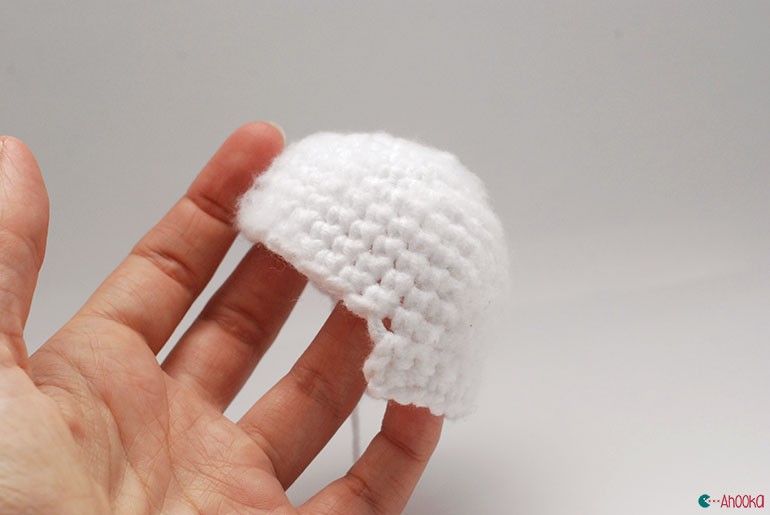
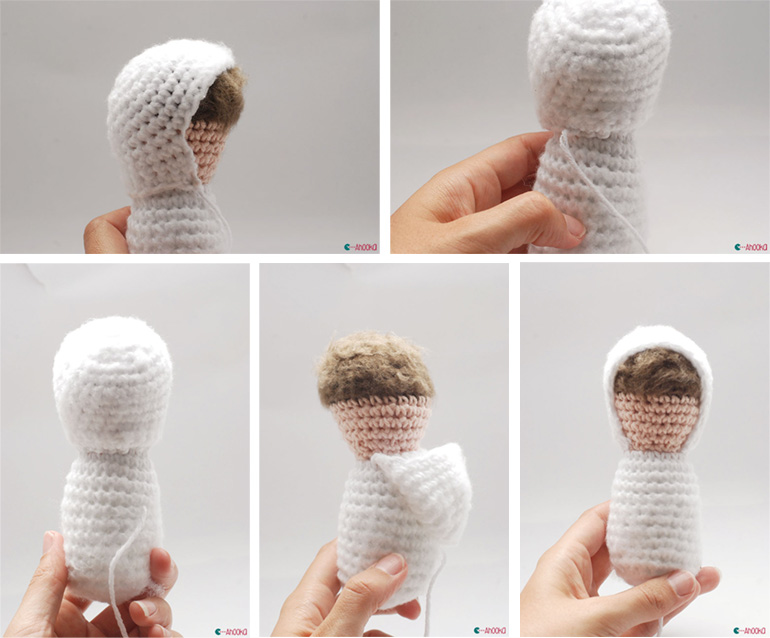
The hood
With white yarn
R1: sc6 in a MR (6)
R2: inc*6 (12)
R3: (sc1, inc)*6 (18)
R4: sc1, inc, (sc2, inc)*5, sc1(24)
R5: (sc3, inc)*6 (30)
R6 à 10: sc1 in each st (30)
From now on, crochet in rows
R11: sc15, ch1, turn
R12: sc15, ch1, turn
R13: sc15, ch1, turn
Insert the head into the hood and sew it only on the neckline so that it stays removable.
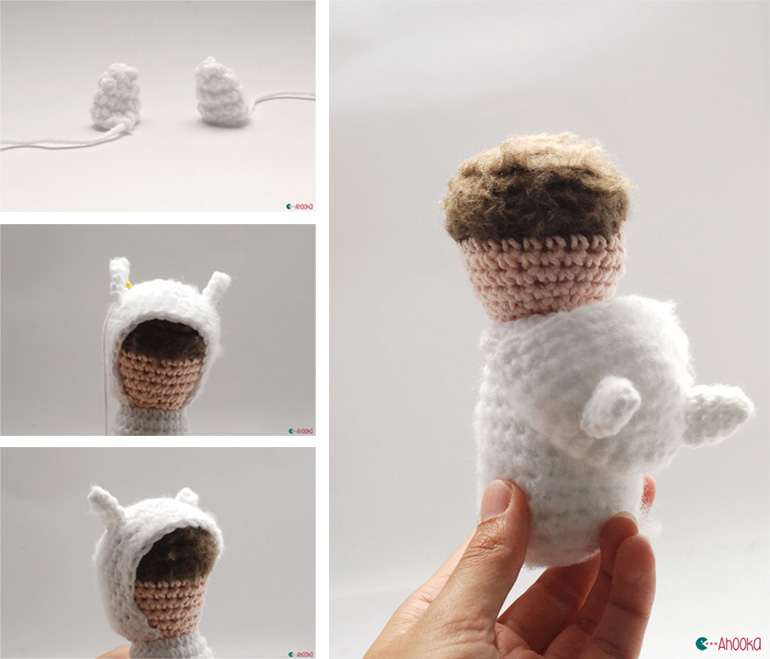
Ears (*2)
With white yarn
R1: sc6 in a MR (6)
R2: sc1 in each st (6) – be careful to turn your work inside out here so that it doesn’t stay on the wrong side.
R3: (sc2, inc)*2 (8)
R4: sc1 in each st (8)
Don’t stuff, pinch both sides together.
FO leaving a long tail for sewing. Pin the ears before sewing them on. Be careful to sew them only to the hood and not through the hood and the head so that it stays removable.
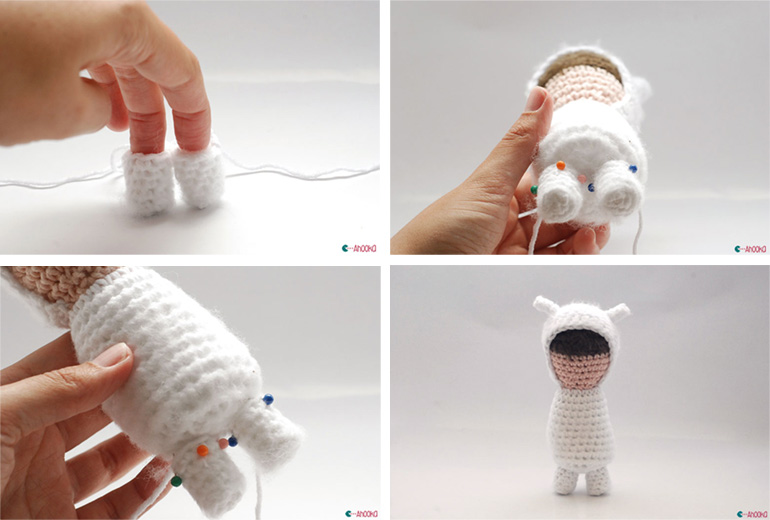
Feet (*2)
With white yarn
R1: sc4 in a MR (4)
R2: inc*4 (8)
R3: in BLO – sc in each st (8)
R4 à 7: sc in each st (8)
Stuff the legs but be sure to keep the base flat.
FO leaving a long tail for sewing. Pin to the body to ensure their placement before sewing them on.
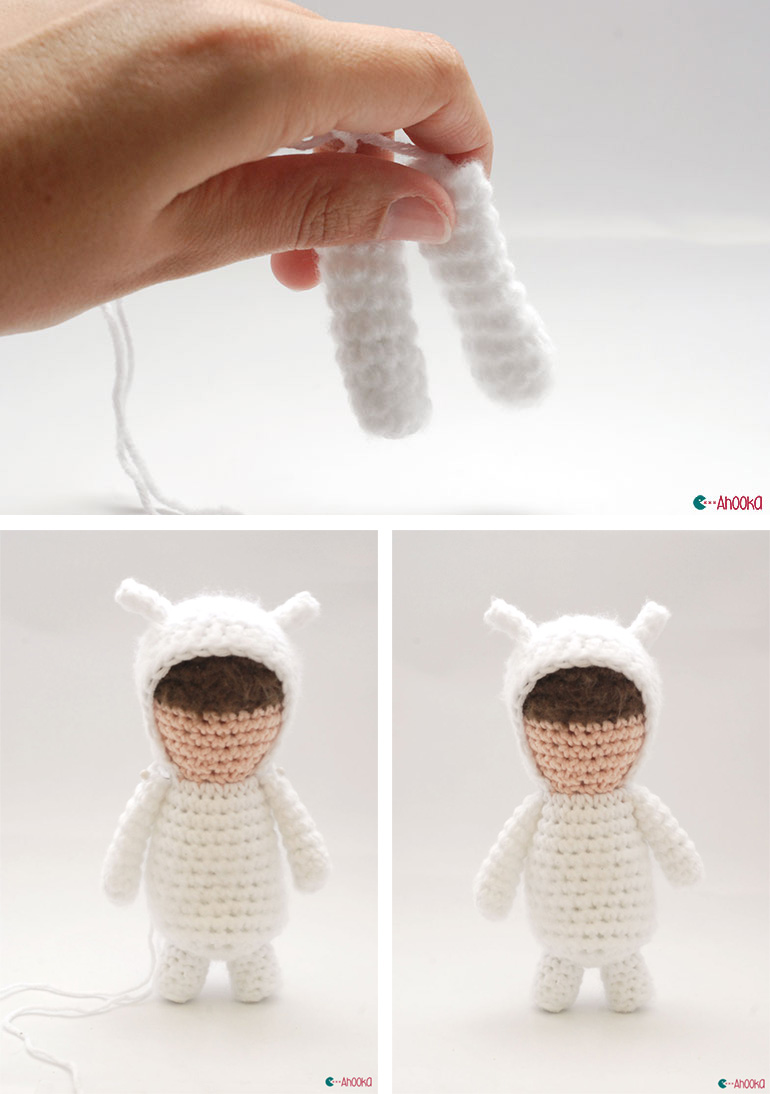
Arms (*2)
Whith white yarn
R1: sc6 in a MR (6)
R2: (sc2, inc)*2 (8)
R3 à 10: sc in each st (8)
Stuff the end of the arms lightly.
FO leaving a long tail for sewing. Pinch both sides together and pin to the body. Sew through both sides together.
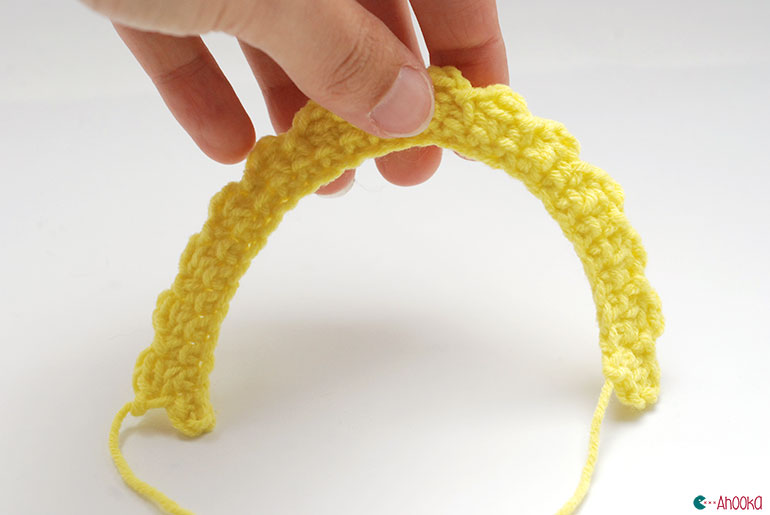
The crown
With yellow
R1: ch31, sc1 in the 2nd chain for hook and in the 29 remaining stitches (30)
R2: (ch2, dc, sl st)*15
Sew both sides of the crown together and weave in the ends.
The tail
As for the tail, I’ll redirect you to Sharon Ojala’s unnamed monster pattern as I used the exact same one. If you add the pipe cleaners in, it will help you make your character stand up by its own (see pic below)
Then, pin it to the body and sew it on.
Face details
First, cut out 2 circles in black felt and glue them on, then, add 2 tiny white circles.
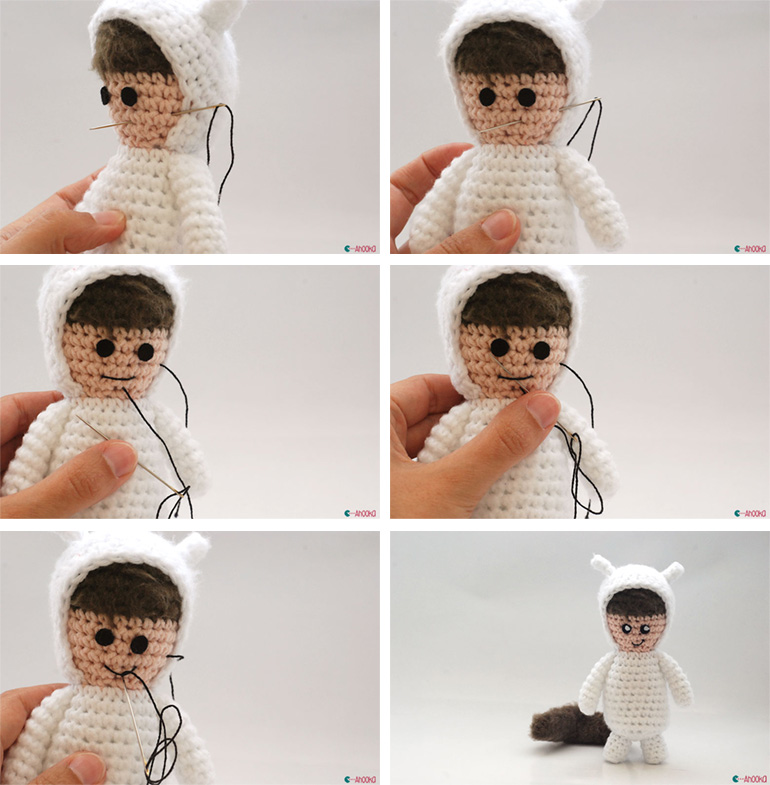
Now, embroider the mouth. In addition of the pictures below, you can read my tutorial to embroider amigurumi details to help you out.
Whiskers (optional)
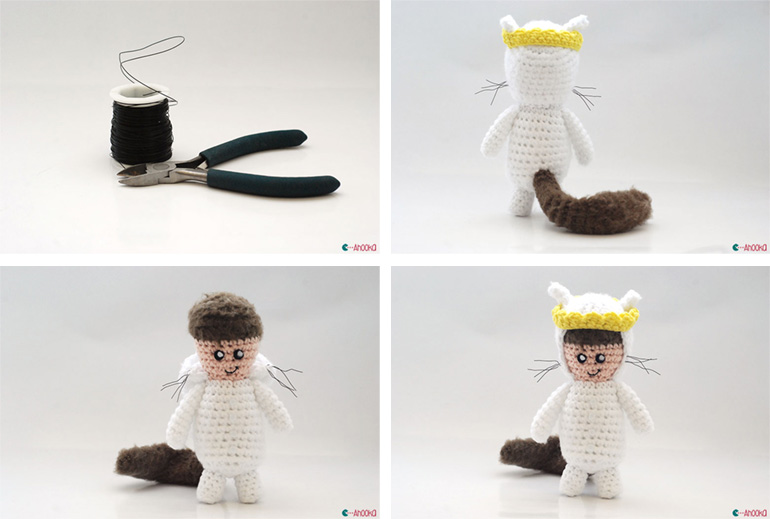
Max’s desguise has little whiskers on the sides. In order to make them, I used black jewelry wire that I cut in small pieces. I then folded them in half and add them to the sides of the hood. But of course, I would not recommend to add those whiskers if Max is made for a small child.
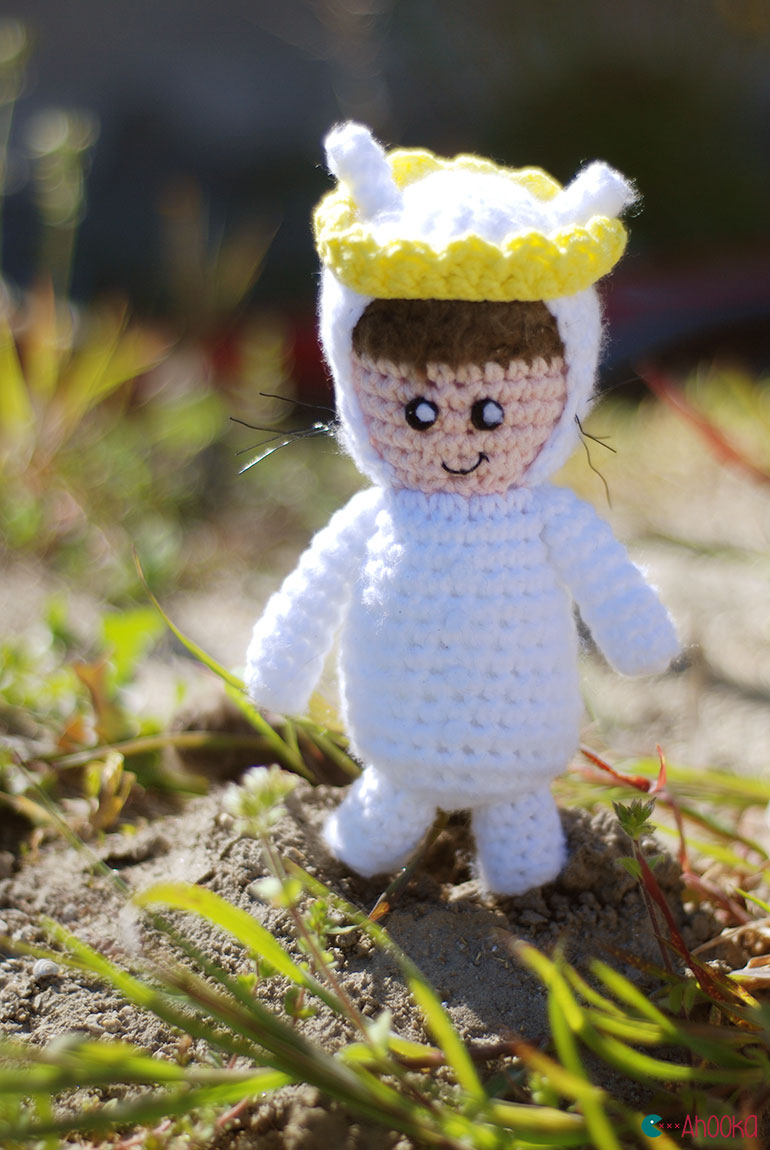
Aaand, you’re done !!




Thank you for making Max and for sharing the instructions! I look forward to making him.
You’re welcome !! :) It has been so much fun !
You did awesomely well on the pattern for Max…looks exactly like him! What a great likeness. I hope you showed it to Sharon Oja. Than you very much for sharing the pattern.
Thank you very much !! I’m so glad to read your comment :) Yes I showed it to Sharon, and she even shared it on here facebook page which made me very happy too ! :)
You’re very welcome for the pattern :) See you soon !!
Do you sell these made ?
No I’m sorry Madison ! But maybe you can find someone on Etsy who will be willing to make a special order for you !
Don’t know if I will ever get around to actually making these, but know that my heart sings a happy tune EVERY time I look at these. Evokes such wonderful warm fuzzy feelings! You are a gem! Thanks for sharing : )